Uh Oh!

gobozo

New member
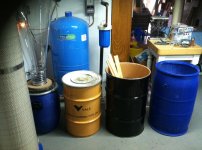
I checked and rechecked my ceiling height at 96 inches. The lift works great and drew the motor to 1" from the ceiling. I locket the lift trolley to the upper mounting anchors and leveled everything but low and behold the filter transition is 1.5 inches to low and the bottom of the cyclone is about 2.0 inches to low.

A little brain power tells me to scribe the top of the cyclone uppermost section, cut and remount, raising the cyclone. Then I need to reconfigure the cleanout to drop the filter down the required amount.

Anyone else had to do this. I wonder if the height discrepency is due to the larger blower 16"? Thoughts and comments welcome.
 
I also had to make an additional 1.5" of clearance for mine (with the 16" blower).

I built a stand for the cyclone and put the top of the brackets exactly at 8 feet off the floor, if I remember correctly, but the trash can (which I also measured as the correct height) would not fit under the cyclone, so I ended up putting "feet" on the stand which were basically sideways-turned 2x4's to get the needed clearance.
 
I wish I had another three inches of clearance. SinceI don't, I have to come up with another solution. The loss in height for the filters can't be attributed to the blower or cyclone since it's height is referenced from the top of the blower housing, not the bottom.

The height issue with the can is more of a mystery and must be attributed to the height of the infeed transition cylinder. I've made some measurements and it looks like I can take a little off the top so to speak and relay this removal to the inner cylinder as well.

Any other thoughts are welcome, especially before I start cutting! :eek:

BTW: I posted more images of the lift mechanism, showing the trolley.

Alan
 
Last edited:
I believe you would be making a huge mistake modifying the top section of the cyclone rather than finding a shorter collection bin solution. Cutting down the upper cylinder and internal riser tube are irreversible changes, while there are a variety of non-destructive bin solutions available (e.g., you can make your own box, as long as it is air tight).
 
If you're using the standard metal trash can, I believe you could get several inches of clearance by replacing the metal lid with a flat piece of MDF routed to fit, as many do already.
 
Well it's done...almost. I managed to find a nice selection of smaller receptacles: a 15 gallon blue plastic unit having handles, a 20 gallon steel drum in nuclear yellow (once contained nickle powder - nasty stuff), and a lower, wider white bin. I decided to start with the 15 gallon plastic drum. It most closely matched the required height (the bottom of the cone is at 28"). The lid needed reinforcement but a little MDF took care of that.

The filter stack required a little more work. I started by disassembling the cleanout I purchased from Clearvue. The clear plastic was removed and mounted via double sided tape to a 4" wide strip of ply with one long edge overhanging and the bends facing up. The overhang was set to the saw fence and the piece reduced in width by one inch. I didn't attempt to cut the bends on the table saw, so these were trimmed by hand. Care was taken to remove the plastic from the tape so as to not crack the piece, this stuff does not appear to be lexan (confirmation anyone?). A new cleanout block was made from 3/4 MDF stock using a 2" pvc cleanout inserted into a custom built hole. The MDF was rabbetted to fit the existing slots in the stock unit and all was caulked with the "Alex" material and a new hole drilled for the second small screw since one was lost in the trim. Now the unit is 1" lower and fits like a glove.

Now on to the plumbing...
 
Last edited:
I thought others might like to see the various barrels that I have acquired. They are:

15 gal. plastic (the handles are nice but the size requires frequent cleaning)
20 gal. steel (perfect size for me, not too big or heavy and holds enough)
30 gal. steel (a little heavy to lift when full)
30 gal. plastic (a perfect size to support the cyclone when assembling or performing maintenance since the upper portion of the cone rests on the lip)

I did not measure the cans up but will do so.
 

Attachments

  • photo2.jpg
    photo2.jpg
    296.6 KB · Views: 0
Back
Top