Venting outside and ducting - I am brand new to dust collection

Good morning:

I used the wrong word when I said I needed to find a forum and asked for recommendations. I meant another topic. I did not want to get off-topic with wiring discussion. When I first started this topic I figured that each shop is unique and a new topic would not be questioned.

I had started yesterday and the day before to scan the topics on wiring on this site (I am going to have to adjust a little because to me they are ‘forums’ on this site but I know that is not how they are reckoned by everyone else.). That is what I was asking a recommendation for… a topic best suited to what I am preparing to do that is current and still relevant. I’m also uncomfortable posting a question in a topic whose last reply was in 2005. I’m comfortable wiring a 30 amp circuit needed for this, but as I read the posts on this site (in that topic), people were talking about ‘phase’ and shutoff boxes, etc., and I realized I was out of my depth for the moment. I know how to learn and I’m not brash or impulsive. I just wanted to know how to direct my blows effectively when it comes to reading. This site is obviously the place to be because it deals with the device with which I will be working. There is just a LOT of stuff on this site and my information need is more immediate and will change once my wiring work is done, so I figured I’d ask if there is a best thread here.

I had another question that occurred to me yesterday about the dust bin that sits below the cyclone. Has anyone used (or considered) a modified hopper of a shop vac? I don't know if it is silly but it occurred to me yesterday that this might be an alternative for me to making one. These are somewhat inexpensive, wheeled, and air-tight (in/out would have to be blocked). My calculation is that I can use a box 20 inches high maximum, and that would be about a pencil thickness lower than my ceiling, which is 88.25 inches. The height I have is actually probably less if I figure on disconnecting it from the cyclone for emptying. Also, would lining this hopper (whatever I use) with a heavy garbage bag be possible, or is there a reason not to do that?

I don't know just yet how to send messages privately. I do most of my editing in Word so that I can catch spelling and grammar errors before posting. When I use site editors, I'm always at risk of losing a long message because of some hiccup or other. When I figure out how to send a private message, I will send a request for the information offered about the torsion box.

as always, thank you (all) for the help here.
 
I tried to send a private message (I figured out a way to do it) but I'm not authorized to do that here.
 
I can't send a private message on this site either. I get the same error message that I'm not "authorized" to do that.

For the dust bin, there is no magic to what kind of container you use, just that it be air tight. A shop vac container would be fine if you can add a top that will seal it securely; capacity may be an issue. Bag liners are a different kettle of fish, however. Since the dust bin is under vacuum, just a bag will get sucked up. You will need some type of internal retainer to line the inside of the bag like Richard L. Brown (bababrown) shows in his gallery photo series:
http://www.gallery2.clearvuecyclones.com/v/CV1800+and+CVMax/bababrown/IMG_1758.JPG.html

Most people remove the dust bin itself and carry it outside for emptying. I opted to buy the Oneida-Air 23" tall 35 gallon fiber drum, but even that is taller than you say you have room for. Another alternative is to build a box using 1/2" MDF or plywood. It doesn't have to be round, just air tight.

Wiring is straight forward if you're already comfortable installing a 30 amp circuit. Since you are waiting for electronics to come, I assume you purchased the Clear Vue pre-made switch box, correct? If so, wiring is even simpler because this makes it pretty much a turn-key installation. In my installation, I did have my electrician come to check all of my work and make the final connections.

A shut-off box, or local safety AC disconnect, is required by code on a 30 amp or greater circuit when not in line of sight of the circuit breaker panel. For a 5 HP motor, you need a 60 amp rated box. These are non-fused, cost about $10-13, and are readily available at your local home center. These simply provide a local disconnect just ahead of your cyclone and are for the safety of those working on the powered unit (typically an outside air conditioner unit in most residential homes). Since the switch box from Clear Vue has a receptacle and plug for the motor connection and is not hard-wired, my electrician was comfortable that this provided the local power disconnect to meet code requirements. In my case, the switch box was also in view of the breaker panel so no additional local disconnect would have been required in any event. (Now I have a disconnect box to return to Home Depot.) If you are hard-wiring the connection to the motor, then you need to include the safety AC disconnect box just ahead of the motor to allow someone to assure power is off before working on it.
 
Egbell,

This is a long post which hopefully will help as you proceed with your installation. Congrats on the CV1800! I am sure you will really appreciate the machine once operational.

Orientation of wyes: As I proceeded with installation of duct, there were performance compromises I made. I believe that these compromises are inevitable. But I tried to minimize them. Space, layout, and cost were the primary reasons compromises were made.

The duct work in my shop is ceiling mounted and the wyes at the ceiling are mounted horizontally, parallel to the ceiling. I also have vertically mounted wyes. I have witnessed a minor amount of planer shavings drop back into the planer flex hose when I shut down the dust collector. While I cannot say for sure, it appears that the blast gate is trapping some shavings. I have not noticed a problem elsewhere but since I cannot see inside the pipe, I cannot say for sure. I leave the CV1800 on for at least 15 seconds after a machine is shut down.

Flex Hose: Minimizing the length of flex hose as McRabbet suggested is the best way to reduce static pressure. The properties of the flex hose are probably the primary cause for its typically higher static pressures. The interior wall of typical flex hose is corrugated and thus induces turbulence into the air stream. Static pressure can be reduced by using more expensive “smooth” walled flex hose. While not truly smooth interior walls, the interior walls are far smoother than the standard corrugated flex hose. Therefore, if budget permits, smooth walled flex hose would seem a better choice.

An additional option for flex hose also exists. Some flex hose is made to dissipate static charges. This too is more expensive but is a nice option if budget permits. I wish I had gone that route for the flex hose at the planer. I find that static charge build-up of the flex hose pulls the few strands of hair that I have toward the flex hose when retrieving lumber from the outfeed side of the planer. One of these days I will wrap the outside of the flex hose at the planer with a copper wire which will be grounded.

Table Saw Dust Collection. Collecting dust at the table saw is a challenge. My guess is that dust in the gullets is trapped, some of which is released on table saw top. I suspect that there is a lack of sufficient air flow around the spinning blade. At least surface debris still collects on the table saw table despite the dual 4” dust ports located in the cabinet.

I do not have blade guard dust collection, but I frequently read that many are well pleased with Shark Guard over the blade table saw dust collection hood. It is a blade guard designed for top side duct collection. It may be worth a look:
http://www.thesharkguard.com/

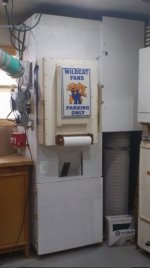
Cyclone Enclosure: I enclosed the CV1800 in a free standing enclosure on castors. I sought to reduce noise, make empting the dust/chip collection drum easier, and allow the cyclone to be rolled out from the corner for service, should that be needed. The footprint is 24” deep x 54” wide x 96” high (from the floor and inclusive of castors). The 96” height was achieved by modifying the height of the fiber drum that sets under the cyclone. The filters are stacked one on the other and are included in these dimensions. I left some space around the filters. The filter stack sets outside the cyclone enclosure and easily removable panels are mounted to the cyclone enclosure set in front of the filter stack for noise control.
CV1800 Enclosure (337x600).jpg

I documented this build at:
http://www.clearvuecyclones.com/for...control/1353-unique-portable-cv1800-enclosure

Hopefully the following additional info is of some value…

Planning: I presume you are either preparing a detailed duct work plan or have already developed one. I found that the time I took to develop a detailed plan for routing of duct work was indispensable when acquiring the correct amount of material and then when installing the duct work. I went to the trouble to drawing the path of the duct work on the ceiling when it came to install.

Duct Work Installatio: In my installation, I enlarged and reduced the diameter of the PVC pipe with a heat gun and some shop made dies. I documented my duct work installation, which you may or may not find helpful at:
http://www.clearvuecyclones.com/for...61-duct-work-installation-using-sdr-35-6”-pvc

Material: Here are the I found for materials I used...

Woodstock T23830 - 6" x 4" x 4” D/C Adapter; Rather than using a 6” x 4” x 4” wye or reducing from 6” to 4” at the machines (both of which would reduce air flow) or enlarging existing 4” dust ports to 6”, this adapter was used to transition from 6” to the dual 4” dust ports on the machines. A second 4” dust port was added to the machine:
http://www.grizzly.com/products/6-x-4-D-C-Adapter/D4240

Woodstock T23829 - 4" Angle Dust Port, for adding a second dust port to machines with a single 4” dust port:
http://www.grizzly.com/products/4-Angle-Dust-Port/D4239

Blast Gates: BGSK06 6” Aluminum Self-Cleaning Blast Gates, required shaping PVC pipe to fit (I did not use the CV blast gates but since these blast gates appear designed to fit PVC pipe, I would use the CV blast gates if installing duct work today.)
http://www.blastgateco.com/Cast-Aluminum-Self-Cleaning-Blast-Gates.php

FLX-30, Flex Hose, 6” smooth interior walled (HFLX3006); also Flexaust offers a variety of smooth walled flex hose including pricier static dissipative flex hose (see Amazon):
http://www.blastgateco.com/Flex-Hose.php

Flex-Tube PU Polyurethane Duct Hose, Clear, 4" ID, 0.033" Smooth Wall which I found to be fair stiff:
https://www.amazon.com/s/ref=nb_sb_...ane+Duct+Hose,+Clear,+4"+ID,+0.033"+Wall,+25'

Dust Collection Barrel, which was modified: 47 gal. Brown Fiber Open Head Transport Drum
https://www.grainger.com/product/GRAINGER-APPROVED-47-gal-Brown-Fiber-Open-Head-23Y340

SDR-35 6” x 10’ pipe, 45 degree elbows, 6” x 6” x 6” wyes, hanger straps, aluminum HVAC foil tape, #10 x ½” and #10 x ¾” sheet metal screws, and hose clamps:
My Local Menards Home Center
 
Egbell,

Overall Height and Dust Bin: When I designed the enclosure to house the CV1800 I subtracted 3” from the ceiling height; the distance from the top of the motor to ceiling. I figured the 3” space between the top of motor and the ceiling would be adequate to vent the motor. This left me with a distance from the bottom of the cyclone funnel and floor that did not correspond to standard barrel heights.

Since maximizing the quantity of debris collected from the cyclone funnel was important, I elected to modify a too-tall 47 gallon fiber drum. I marked a level line around the perimeter of the fiber drum at the proper height and cut on the line with a jig saw. The cut edge of the fiber drum was then reinforced with 1/8” thick x 1” aluminum bar stock, inside and out held by through machine screws and acorn nuts.

When I was considering the dust/debris bin problem, I gave passing thought to building a rectangular box. However, CV support recommended a circular container; presumably as a way to improve separation. The cyclonic flow of air continues down into the debris container, which I have witnessed on my system. I considered building a rectangular debris bin with sheet metal installed in the corners to smooth air flow but concluded buying and modifying a barrel would be easier and work better.

The shop vac container could be used if it is strong enough to resist imploding. However, even if strong enough, its capacity may be less than that of a larger diameter drum.

If you wish to line the drum with a plastic bag, then as Rushton observed, a bag will be sucked into the cyclone without a system to hold the bag in its container. There are two types of bag retainers of which I am aware. The first is a mechanical system where a structure like that shown in Rushton’s link is inserted into the bag.

The second method for holding a bag in place relies of suction. Grizzly and Oneida (on some of their systems) use the suction method. A length of properly ID sized tygon tubing is run from the cyclone inlet to the dust/debris collection container. While the cyclone is running, a vacuum is pulled in the tubing and in the space between the plastic bag and walls of the container, holding the bag in place. It depends on a more or less tight seal of the bag opening and the container.

Wiring: I found that electrical preparation for the CV1800 was straightforward. I used the CV control box and installed the McRabet bin level sensor (which I highly recommend). In my case, I opted for receptacles and plugs. I am not an electrician but do my own electrical work, which is inspected by the county building department (safety and insurance considerations). Two circuits are required; 240v 30amp and 120v 15amp.

I installed a 240v 30amp dedicated circuit which is terminated at a 240v 30amp locking NEMA L6-30R receptacle. It is un-switched but a 240v 30amp toggle switch could be used to switch the circuit. A length of SOOW 10 gauge 3 wire cable outfitted with a NEMA L6-30P plug was wired to the CV1800 control box. The plug is mated to the receptacle.

This 240v 30amp wiring approach added to the cost but allowed for the CV1800 to be easily unplugged from the circuit. The CV1800 could have alternatively been wired directly to the 240v circuit without a cord and plug configuration.

A second dedicated 120V 20 amp circuit was run (although a exiting 120v circuit could have been used) to accept the 120v relay plug from the CV control box and from the McRabet bin level sensor relay. The receptacle is switched, as recommended by CV support at the time of my installation. Turning the switch off prevents a stray radio frequency from inadvertently turning on the CV1800.

I encountered one problem when wiring the motor. As I recall (and after two years my recollection is a bit fuzzy) the motor junction offered wiring diagram(s) that refer to wires numbers but I could not determine which motor wire corresponded to the labels in the diagram. After about an hour of head scratching, I realized that each wire in the motor’s junction box was labeled consistent with the motor cover and the CV instructions. I recall that the method of wiring the motor within the motor’s junction specifies clockwise or counterclockwise motor direction.
 
Wiring the motor - Since I just finished doing this with a currently manufactured Leeson motor from Clear Vue, I thought I'd chime in with what we found:
  1. The motor was wired for CCW rotation from the factory. Reports over the years reflect that this is not always the case, so check yours.
  2. There was a nice diagram on the INSIDE of the electrical connections cover plate for wiring the motor CCW/CW.
  3. The wires were embossed with letter identifications that matched to the wiring diagram.
YMMV, so look carefully at what the Leeson factory has shipped to you.
 
Good morning:

I have just read the preceding posts and it is going to take some time to digest, but I do have a question. I know that 30 amp circuit needs a 10 gauge wire. However, on some posts in other topics on this site, there is a distinction drawn about circuits for motors being different somehow, and I drew an inference that perhaps 8 gauge wire might be needed. I’m not an expert so I ask. The consensus has been for 10 gauge from CV and from most people who commented on it, but still I have to ask.
Also, my home is 44 feet long and the wire will run through the basement ceiling. If I figure roughly 15 foot for the drop to my box (I run my connections through the bottom of my box, so it would be down from the ceiling and back up again) and 6 feet for my drop to the DC, I have 65 feet of wire. Is this enough to cause me to need 8 gauge? I don’t believe it is but I don’t want to cause problems with line drop that I can avoid with a question. One of the first things I did when I moved into this house was to have 200 amp service installed. I contracted that out because it had to be done in one day. I have done it myself in a previous house all the way to the meter, but I had more time than money then.

I have mapped out my duct work on paper including fittings. It is not pretty but I’m prepared to buy exactly what I need (plus a small allowance for the fact that I’m not the smartest person in the world. I can prove it!) Did not think of marking it on the ceiling but that would not work on my ceiling but my layout is pretty simple.

I have been spending some time researching bins for collection. I like the idea of cutting a fiber barrel though I have some concerns about my ability to circumscribe and cut a straight enough line. Is there a technique to do that? I am not as concerned about the volume of my bin. I would prefer a bigger bin, but that is probably a man thing. I work in spurts, so when I generate dust, I generate a lot, but there are times when I don’t. I’m not 18 anymore. I’m working on my fourth 18, and I am the only one around who will empty those bins. I live in a remote area where I’m allowed to burn this stuff, but getting it to the burn area is still a consideration. Smaller with more frequent emptying is acceptable. I’ve looked at small barrels, 5 gallon buckets, fiber and plastic and steel barrels, and building something hexagonal or octagonal. (I did not think of the sheet metal liner.) I’m not set on anything as yet because I’m scouring Internet and experts for ideas.

I have another question about something that just occurred to me. This is one I have not seen anywhere I have visited in this forum. The diagrams I see all seem to picture a linear alignment of inflow and outflow. The cyclone is a cylinder. Can it be rotated during assembly such that the outflow is 90 degrees rotated from the inflow. I’m talking 90 degrees horizontal. I know that that the standard transition is 90 degrees vertical. (and that brings up another question.. is the standard transition mounting square or rectangular… that is, could it be rotated 90 degrees to do what I’m contemplating?)

My home is designed as a mobile home. There are 2 I –beams that run the whole length of the house. I hung my ceiling using the lowest flange of the I beam as a support for some of the ceiling grid. As I recall, the beams are about 20 or 22 inches from the block wall. I’m wondering if I can rotate the cylinder during assembly such that the dust collector would fit between the beam and the block wall parallel to it. This would give me a bit more head room. Quite a bit. I don’t know if this would work out just yet or even fit, but it would help if someone could tell me if this is possible with the assembly of the ducst collector. It would address or even eliminate my problem with height. Is there that kind of flexibility in alignment of the cylinder to the impeller housing? It would take more room on the other wall, but that would not be bad, and it would also give me more room in context of the 5 foot coming off of the input, though I’m ok on that either way. Can anyone confirm this is possible?

Finally, is there a way to make this editor default to a larger font? I change it to 14 so that I can read it. It would be great if I could teach it to remember that.
 
Smaller with more frequent emptying is acceptable.
I agree with this! This is why I went with a fiber barrel (they are light) and was happy with 35 gallons and more frequent emptying. I'm rapidly approaching your 4 by 18 and the thought of moving steel drums or large plywood boxes up a flight of stairs to be emptied just wasn't going to work for me over the coming years. But 10 gallons would drive me nuts in the frequency of emptying that this could require, particularly if I add a planer to my shop.

I know that 30 amp circuit needs a 10 gauge wire. However, on some posts in other topics on this site, there is a distinction drawn about circuits for motors being different somehow, and I drew an inference that perhaps 8 gauge wire might be needed.
Everything I've read, and my electrician, confirm that 10 gauge wire is the right choice for this application. I'm sure you could find an online tool to calculate the voltage drop over your 65 feet, but I doubt it would be material and not enough to justify going with 8 gauge. I have 45 feet on my run of 10 gauge. The discussion about allowances for motors revolves around the fact that they have a high current draw when starting up but they settle down in their demands, so the national code takes this into consideration.

As I recall, the beams are about 20 or 22 inches from the block wall. I’m wondering if I can rotate the cylinder during assembly such that the dust collector would fit between the beam and the block wall parallel to it. This would give me a bit more head room. Quite a bit.
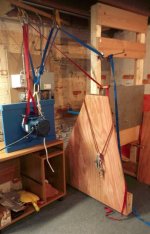
In my case, I've used the space between my ceiling joists (16" on center) to lift the motor into. This gives me 8" more vertical height (top of mounting plate to top of motor). The mounting plate is 24" x 18" so the entire mounting plate could not fit into the joists, but the motor could extend up into that space. In your situation, you could slide the entire mounting plate up within your space if you could figure out how to support it. To accomplish this in my space, I built a free-standing portable stand for the "L" brackets which are mounted on a 1 1/2" plywood back panel that I can slid up the supporting stanchions until the head of the motor goes up between the joists. Here's picture of the free-standing stand with the motor/blower/mounting plate staged to be hoisted up and over onto the "L" brackets (which you can just barely see sticking out past the plywood sides of the stand).

R6qdXkvf8rPrW1U52
Motor being mounted on stand.JPG

Is there that kind of flexibility in alignment of the cylinder to the impeller housing? It would take more room on the other wall, but that would not be bad, and it would also give me more room in context of the 5 foot coming off of the input, though I’m ok on that either way. Can anyone confirm this is possible?

The cyclone intake and the blower exhaust can be rotated independently of each other to virtually any angle required for your installation. You determine the angle between them when you mount they cyclone with screws onto the bottom of the blower housing. Once you screw the cyclone to the bottom of the blower housing, the two will then rotate as a unit retaining the angle you chose when you screwed the cyclone to the blower housing. You can change this angle later, but to do so you would have to unscrew the cyclone and then re-attach it.
 
Ed,

65 feet is about the limit for 10 gauge wire -- the 5 HP Leeson motor is rated at 21.5 Full Load Amps but will run at less wen up to speed. My CV1800 is wired with 10 gauge non metallic cable to the disconnect box next to my cyclone (see this link for an example, but I'm not an electrician).

With your ductwork, be sure you design with some flexibility as shops tend to change. Try to minimize extra bends and with PVC, you do not need to screw or glue joints together since the pipe assembles tightly with low leakage. As stated before, avoid long flexible duct use and keep the first 5 feet of duct at the cyclone inlet straight.

You cannot lay the cyclone on its side as gravity is required for the dust to fall into the bin. I recall installations in the CV Gallery (accessible from the main CV website, not the forum) where slanted installations have been made, but I do not know how well they may have worked.You can rotate the blower outlet to any desired position relative to the inlet. I use a linear polyethylene food drum for my bin. I have seen them at farm suppliers and scrap yards or on Craigs list. Their advantage is no seams to leak and they can be cut down by carefully marking a line around the girth and cutting with a sawzall or jig saw. Smooth the edge and make a round top from 3/4" MDF with a groove router out to hold a flexible rubber weatherstripping gasket. Use a metal starter collar sealed with silicone caulk for the flex connection to the cyclone.Suction will hold the top tight, but a set of lid latches like these will ensure a tight fit.

As for font size, you can change the display size on your browser by holding the CTRL key and scrolling your mouse (or use CTRL +/-) to change the display size. I keep mine at about 125% of normal for easier reading.

Hope this helps.
 
This is all excellent! I have another option now, I believe, if I rotate the exhaust side of the collector 90 degrees, perpendicular to the input. I have ordered a straight transition. The assembly instructions answered my question about rotating the standard one, but I asked it anyway in case it might help someone else.

If I have room between beam and wall, I can get the unit higher AND the filter cleanouts will be totally clear for access. I have to measure and I'm still sick and will not be going into my shop to measure today, but this would make the height problem either go away or get considerably easier to resolve. The new problem will be hoisting the motor assembly into place because the beam would be an obstruction in that part of the installation. Not for the use, just for the installation. I'll do my measurement.

I have some other ideas now too. One concern is that hoisting the motor assembly up, if I can do that, is going to make it even louder in the back bedroom just above that part of my shop, and I'm also going to have to 'unsuspend' a little corner of my ceiling and figure out another way to close it in to isolate the dust. My basement ceiling is now finally totally enclosed, which I had to do before even considering dust collection.

I now have another question about noise reduction. It occurred to me after Jsbrow posted about his mobile enclosure. Would it help at all if only the 'business end' of this collector were enclosed somehow? I am asking these things sight unseen so I don't know if that is even possible, but it occurs to me that much of the noise is going to emanate from the motor and if that could be isolated a little it might help.

Funny you mentioned about using the cyclone on its side. I did not contemplate that but was briefly wondering if the filters could be configured like that. The dust cleanouts suggest not, but I did wonder.

My shop is pretty populated just now, and I don't foresee any more big tools. I don't have room for them. Most everything I have is on wheeled cabinets and I have a couple more to build, but they are already planned for in my ducting. The last tool I wanted was a lathe and that is why I bought the ShopSmith.

My design is for all 45 degree turns, though I also priced 22.5 degree turns as well. Someone somewhere in my reading suggested a ratio of 5:1 on the straight piece that joins a turn... in other words, I would need a 30" straight between 45 degree elbows with 6" pipe. I will adhere to that as closely as possible but it may prove difficult/impossible in the runs I have to make in the space I have to make them. I have a 7 or so foot straight planned off my collector which will have to go up and over a beam (45 + straight + 45, after the 5 foot run and before the first drop) , then turn an immediate left (45 + straight + 45) and cross my shop. That is the extent of my mains. I foresee a few drops from that. My plan is a single drop after the 5 foot 'quiet' section (6") that is split into another 6". These will serve my radial and mitre saws with blast gates on each run. After the turn, I plan on two drops, same 45/45, to handle my table saw and one to handle my planer/router. These two are on a flip top bench. This main will also have a drop to handle my drill press, jointer, and a small sander. I *think* I have made the best routing possible and I did not mention the 6" to 2 4" splits I have planned, etc. Since my order has been on hold due to a delay in the mounting bracket, I have just a wee bit of time to consider requesting a change in the order for 5 of the factory second blast gates and just building the mounting bracket myself. (I purchased a package).

I have high hopes for the power of this unit. My wife has heard me talk about it and is concerned about the dog getting sucked into the dust collection.
 
Just be sure you keep adequate space for the motor to cool; they get hot! And don't try to lift the motor- blower unit by yourself -- it is a 2-man job, even with a block and tackle. Just saying...safety first.
 
egbell,

Appropriate wire gauge: I looked at the “Table of Wire Sizes for 240 Volts Single Phase” found in Wiring Simplified, 34[SUP]th[/SUP] edition. The 34[SUP]th[/SUP] edition was published in 1984 but since physics does not change I am confident these values remain unchanged. Wiring Simplified is still in printed in later editions and I have seen it in some home centers. It is an easy read and highlights some sections relevant to residential wiring found in the National Electric Code that was in force at the time Wiring Simplified was released.

My interpretation of this table is that the length of 10 gauge wire through which 30 amps at 240 volts can be run before suffering a 2% voltage drop is 75 feet and 8 gauge wire is 120 feet. But this is only part of the story. Additional helpful information is the voltage as well as the allowable variation in the voltage delivered by your power company. Lastly the motor is likely to have a voltage range within which it is designed to operate.

My power company delivers 240 volts to the meter with an allowed variation in voltage of 5%, so the minimum voltage I can expect from the power company at the meter is 228 volts. Supposing a length of 75 feet of 10 gauge wire, another 2% voltage drop is predicted the table sited above. Thus the minimum voltage at the end of the 75 feet run would be 223 volts. If the minimum operating range of the motor is less than 223 volts, then 10 gauge wire would be fine. But if your power company delivers a lower voltage and/or tolerates a greater range in the voltage than mine or there is a significant voltage drop from the meter to the load center, then these calculations would need to be re-done.

On the other hand, the only negatives in running 8 gauge wire are it is stiff and thus more difficult to work and it is more expensive.

Mapping duct work on the ceiling: You are probably correct that drawing the placement of the duct work on the ceiling is unnecessary. I drew the map on the ceiling because I became disoriented when installing the duct and making measurements from a wall to the duct was difficult.

Dust/debris barrel: When I mill lumber at the jointer, planer, and shaper (or router), the shavings quickly fill the barrel. The larger the barrel, the longer I can continue milling before emptying the barrel. My 42 gallon barrel containing shavings is not very heavy. This contrasts with the barrel filled with saw dust and dust from sanding. Under these circumstances, the large barrel can be emptied before it becomes too heavy. The fiber drum is lighter than the steel drums, making things a bit easier.

The cut line drawn around the barrel first required me to measure up from the bottom of the barrel and place a tick mark. I made these tick marks about every 12” or so around the circumference of the barrel. I then connected the tick marks using the 1/8” aluminum bar stock (used later to reinforce the cut end of the barrel) to connect the tick marks. A hole drill on the waste side of the cut line provided the entry point for the jig saw blade. I then made the cut for some distance, stopped the cut and rotated the drum to continue the cut.

Orientation of the cyclone inlet and outlet: As I recall, the inlet and outlet can be rotated to whatever position works best. But perhaps someone who has recently installed the CV1800 can be more definitive. Also, the assembly instructions may be helpful.

http://www.clearvuecyclones.com/assemblysheets/CV1800MaxAssemblySheet.pdf


Positioning the CV1800 in your space: In another thread, Rushton dug up this dimensioned diagram which may help determine whether the CV1800 will fit in the ideal space in your shop…

http://www.clearvuecyclones.com/inde...d_attachment=1

Font size: There may be a setting under your internet browser’s “settings” or sometimes called “options” where a default font size can be selected.

There is probably also an Ease of Access location for your computer where the computer can be set to display information in a more comfortable fashion. I am fairly certain that every computer operating system supports this Ease of Access (as Microsoft calls it) since it is my understanding is that it is mandated by the Americans with Disabilities Act.

McRabet’s tip for font sizing is a great tip that I will try to remember. I too am no spring chicken!

Noise Control: While I am not certain, if space or budget precludes an enclosure or closet to house the CV1800 then perhaps a fair amount of noise can be reduced by modifying the cyclone outlet where it feeds into the filters. Our home’s central vacuum system has a muffler installed on the outlet of the vacuum unit. The muffler makes a big difference in the noise coming out of the unit. Additionally, some cyclone dust collector manufacturers offer mufflers that install between the cyclone outlet and the filters.

One thought to muffle noise at the outlet would be to encase the transition outlet with sound abating material. Then an outer shell could be constructed that covers the sound absorbing insulation and the CV1800 transition. The result would be a sandwich consisting of the inner transition, sound absorbing material and an outer hard shell.

I used Ultrsonic Sound Panels which are 12” x 12” x 1” thick panels for sound abate in my installation. Roxul Safe and Sound or denim bat insulation can also be used.
 
Yes, watch out for small dogs and children! But more seriously, the motor is not loud. I've run my motor briefly and can confirm that the motor itself when not connected to anything is fairly quiet. I've read that the major noise is coming off the blower at the exhaust side. That's where I plan to add some fiberglass insulation via the HVAC insulated flex hose I'm running to my filters, plus a bit more wrapped around the straight transition itself. I'll find out if more noise reduction is needed once I start using it and will consider retrofitting at that time as seems necessary.
 
I just contacted CV and changed my order. It had been postponed because the brackets in the package were out of stock. It would have been shipped next week and the delay was not critical because I would not have been far enough along to use it before then. However, the information I have gotten here even just today helped me to look at some things more closely.

I believe I'm good on 10 gauge wire. The 65 foot was worst case, generous estimate.

The distance between beam and wall is 22 inches, so I can clear that. I have about 99 inches from floor to the bottom of my floor joists. Good there, so I am going to do the standard transition, stacked filters, and rotate the output 90 degrees from the input. This will extend the motor above my ceiling. I believe there is plenty of air/ventilation. Does that seem right or should I think about a fan to cool the motor. I'll open my suspended ceiling as much as necessary and figure out a way to enclose it at the new height/perimeter. I'll have to reroute a little plumbing feed... a drain inside for an outside faucet that allows me to bleed the water out of the line for the winter. All CPVC so it is a quick job. This allows me to have the input just a little higher too, and also moves the whole collector back toward my outside wall some inches. The heartburn it eliminates with the barrel and plenum more than makes up for what I'm going to suffer moving tool racks, etc. I mount a lot of tool racks on my walls, but there are no major obstacles where I need this space. I wish I had thought of this/asked this sooner. Still... I had ordered two collectors and now need only one. I substituted eight blast gates. May be more than I need but I think I'll find use for them all.

What would recommended spacing be for the motor for heat consideration. The area will all be open to my shop but it will be confined just around the top of the unit... 22 inches wide by width of dust collector and filter by height of 11 or 12 inches, the extension above my ceiling, but again, the whole thing will be opened to the shop, and I will never run the device for extended periods of time. I believe I read somewhere that you should not turn this on and off more than 6 times an hour. Did I get that right? I believe the context of the information was caution when using something that automatically turned the unit on when the blast gate opened... does anyone remember reading that somewhere? I'm sure I did.

Rushton, when you do this noise suppression enhancement, I would be interested to see what you did! It may turn out to be unneeded but I would still like to hear if it works well.

As for cutting the barrel, I read a post of yours (Jsbrow) from some years ago about your barrel. The picture was helpful and you used a bicycle inner tube gasket, right? Would it be possible to cut the barrel on my table saw... just rotating it. My big fear is that if I do this by hand I get an uneven line that would just be trouble sealing air-tight. My new circumstance may eliminate this entirely because maybe now I can go with the 30 gallon barrel they show in the picture.

McRabbet... As for hoisting, I may not have much of a choice than to do it myself. I'm pretty creative for stuff like this, but dictated by limited options (which is why I learned to be creative). I live in a small area surrounded mostly by seasonal campers. My sons live 100+ miles away. I'll get it done. Will just have to figure it all out when I get to that point. I was toying with some kind of bevel-edged panel that slides up and down a 2x4 framework between bevelled strips. I have a hydraulic jack... even 12 inchs or so at a time would only take 7 steps. I'll figure it out. For now I'm just really pleased to be able to get the height thing addressed. Thank you all for getting me here. I have not done anything so far but move my shop around and ask questions, but the mental piece is always one of the biggest for me... I like to have the battle mostly won before I wade into it.
 
When I installed my CV1800 in my basement I had a reduced amount of height available for a dust drum. I found a fiber drum with a steel cover and lock ring that has a capacity of 41 gallons with the dimensions of 21.5" diameter X 26" tall. This was the largest round container I could find that would fit under the cyclone bottom/flex hose. I had to shorten the piece of flex a little to get everything to fit with enough room to remove the fiber drum for emptying. The 41 gallon fiber drum is a nice size compromise between full weight and capacity. I purchased the fiber drum from "The Cary Company" and the part number was 26W41F if that helps anyone looking for a nice fiber dust drum.
 
Last edited:
Thank you. That was easy to find with the part number. I just bookmarked it. I am going to continue looking. I have found, and had recommended, quite a few sites. The price and shipping are going to be the deciding factors now. Given a choice, what would the best type be? Plastic, steel, or fiber? This one is listed for $59.78 and about $35 shipping.
 
Ed,

As I mentioned in an earlier post, the fiber drum I purchased is a 23" tall drum with a wider than normal 22" diameter so it ends up with a 35 gallon capacity. Penn State Industries used to sell this drum but they are no longer able to get it. However, the same drum is sold by Oneida-Air for $55 with $60 shipping because UPS classifies it as an "oversized item" (see: 35 Gallon Fiber Drum). I added the metal locking lid for another $12 because I wanted to use that on the bin when I disconnect it from the cyclone to move it outside for dumping; I wanted to leave my plywood lid attached to the base of the cyclone and slide the slimmer metal lid under the opened plywood lid to attach to the drum so dust wouldn't go everywhere as the drum was moved. The cost seemed outrageous with the shipping, but it was time to move forward.

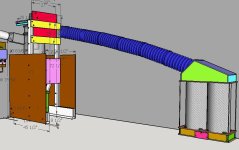
I expect most of the noise reduction in my setup to come come from the 10-12' length of insulated flex hose which will act like a muffler. Bill Pentz talks about this on his website. The straight exhaust transition allows me to put in the noise reducing insulated flex duct line at a gradual slope down to the filters thereby eliminating any hard 90-degree turns in the exhaust (which I think would have a serious impact on the air flow). Exhaust using HVAC insulated flex2.JPG

Your recollection about not starting motor more than about 6 time per hour is spot on - spinning up that heavy steel impeller takes a lot of oompf from the starting capacitor. Stopping and starting the motor more frequently than about 12 minutes or more between cycles cause premature failure of the starting capacitor and earlier replacement. A woodworker using automatically opening blast gates tied into automatically starting the dust collector reported this problem and the need to insert a timer delay into the shut on/off circuit (not sure who it was, I'd have to search for it).

For hoisting, I didn't have a choice but to do it all myself, either. So, I followed Rob's advice of safety first in doing it. I used three cables with mechanical leverage through loops, one was a safety line that got adjusted with each change in height, the other two were the lifting cables that allowed me to pull up one and secure it, then move the safety line, then pull up on the second lifting cable, then repeat the cycle.

Cheers,
Rush
 
Last edited:
egbell,

Motor ventilation: I am not sure what is recommended. The integrated fan of the motor should pull air in (probably the space left between the top of the impeller housing and the motor) and exhaust the motor-cooling air at the opposite end of the motor (probably the top of motor). Therefore I believe leaving free space all around the motor so that ambient air can be freely drawn into and out of the motor is a good idea. I left a minimum of 3” of free space all around the motor including between the top of the motor and the celing.

Passive ambient air from the shop flowing freely around the motor would likely be adequate. An auxiliary fan to keep cool air flowing around the motor (if it is a gentle, low volume air flow) would do no harm. However, with adequate spacing all around the motor and the ability for air to passively move around the motor (that is air around the motor is not trapped) is perhaps all that is needed.

ON-Off cycling: I agree with Rushton about cycling the cyclone motor on and off.

Before installing the CV1800 I thought it would rarely run a long period of time. I am therefore surprised that it frequently runs for up to an hour at a time. I leave it running for example when milling a straight edge at the jointer, marking the width of the board, and then cutting to width at the table saw. It also runs a good while when face jointing, planing, and routing, especially when working a project requiring some nominal quantity of lumber. I suppose it comes down to a trade-off; premature capacitor failure or slightly higher electric bills. I chose higher electric bills.

Cutting the barrel: The barrel was large, unwieldly and tough to control so I avoided the table saw. The diameter of the barrel was too large for the band saw. Therefore I choose the jigsaw. But if you elect to try the table saw, keeping the blade height as lower as possible, using a tall auxiliary fence, paying close attention in keeping the barrel in solid contact with the fence, and having the ability to turn off the saw should something go wrong without removing either hand from the barrel would be the best approach (in my opinion). I personally continue to believe the jigsaw is the best tool for the job.

Bicycle gasket: The bicycle gasket is a unique solution for a specific problem that may not apply to your install. The dust collection barrel sets inside a sealed box (I call the dust collection chamber) and the cyclone funnel is permanently mounted to the top of the dust collection chamber. When the barrel is full, the door of the dust collection chamber is opened and the fiber dust collection drum is pulled out.

Initially there was no gasket attached to barrel. I found that some debris escaped the barrel and landed in the dust collection chamber. When the bicycle inner tube gasket was added to the top of the barrel, the problem of debris collecting in the dust collection was solved.

If you are planning a lid/barrel arrangement (no dust collection chamber), installing a gasket on the lid that locks tight to the barrel would probably be a better approach. McRabbet described the build of the barrel lid and making it air tight (post #29 above). His description sounds like a good approach. The cyclone connection to the dust collection barrel as well as the barrel needs to be air tight for both performance and avoiding unwanted dust escaping the dust collector.
 
Good morning:

I am going to go for my pipe and fittings tomorrow afternoon and start to rough it in. I'm going to have to move a little bit of plumbing before I start with the dust collection so I may not get started this weekend with the duct work.

The biggest problem I face now is just hoisting the motor and I am taking note of everything said here. In the past, when I have had to do things like this, I made up a contraption using my hydraulic jack. This is a little different, but so is everything. The biggest challenge is not the weight but the space. My beam is about 88 inches or so from the floor. I have to get the motor platform higher than that. I cannot build a framework of the needed height because of the beam. Well, I can, but it would have to be between beam and wall. I don't think I could tilt it in because of the beam, depth of the motor platform, and the weight, though I might look into that along with Rushton's idea of ropes. I am also toying with making some kind of telescoping framework that would allow me to work on this at a comfortable height and then use a jack to push it up into place for attachment into my studs. When the unit is so close to a wall, are there troubles I should anticipate making the connections between the cyclone and the housing? Caulking it? These are also things I am trying to anticipate. My telescoping framework approach would make that a non-issue.

I'm also barrel shopping in earnest now. The prices are outrageous, but as Rushton pointed out... "it is time to move forward" I'm figuring this is going to be about $100 no matter what I do. I will check locally to see if I can find someone who sells these, but in the end, I know the savings won't justify the time spent looking for them when the differences between one and another are so small. I still don't understand how suction is an issue at the barrel. It seems like it would be the opposite at this point in he process. How does suction affect the barrel and the material in the barrel not be sucked back out? I cannot figure that out. Still, everyone says it is so it must be.

I saw Oneida's barrel with attachment and hose. It is 7 inches meaning I'd have to adapt it to 6 inches somehow which could also cause an issue on height again. I'm poring through the topics on this site and searching. I saw the one recommended by wmlutz. I also checked Global Industrial and Vestil. I see one recommended on McMaster Carr and I have dealt with them and their shipping was reasonable but I could find no way to know what it was before I ordered. Does anyone know how (if) that can be done on that site? They have other stuff I plan on ordering not related to dust collection. My last purchase was 2 6 foot 1/2 by 1/2 square tubes. $18 for the tube and $16 for shipping. I expected that and did not find it unreasonable but a barrel is a whole other matter because of the size.

I'm also inferring that fiber barrels are fine based on the fact that so many people use them. Are all barrels equal in terms of strength/suitability? I believe I should look for latching tops, right? I'm going to look at Oneida again based on Rushton's description. And at some point, I'm going to get tired of agonizing over the difference between a widget and a widget and a quarter and just "move forward".

Thanks for confirming the power cycling. It is not intuitive. At least not to me. I stumbled across it while researching, but it is very important and not knowing about it would have been costly.
 
Back
Top